Tuesday, 7 September 2010

The best unbrownie you've ever ate!


This past weekend was the perfect weekend to picnic, the weather was great and everyone is always happy to have a 3 day weekend. One of the Jambu team member's baked the best brownie treat for her picnic- it was so delicious we had to share.

This melt in your mouth brownie was poured into cupcake tins and looked a little like a muffin at first, but after the first bite you're in heaven. The marbled brownie mix was perfectly balanced, and not one, but two tiny Reese's cups were stuffed into the center of the brownie! Delicious!

Using marbled brownie mix- prepare the mixes as directed on the box. After preparing mixes pour it into individual cupcake tins 1/2 full. You can probably create a better looking swirl for your "marbled" brownies on top using a knife or fork (um, don't tell her I said that haha). Once you get the batter in, push one or two mini Reese's peanut butter cups in to the center.

There you have the best "unbrownie" you have ever ate!

Wednesday, 25 August 2010

A Simple Breakfast Smoothie


It's been pretty chilly around here these past few days, but tomorrow the weather is supposed to warm up! While it's still hot, I thought I'd share my favorite breakfast smoothie recipe. It's quick and easy... and healthy too! It will load you up with the vitamins and fiber you need throughout your day, and it's just so good you can't resist! :)

What you need:
  • 1 Banana
  • 1 and 1/4 cup OJ
  • 1 and 1/4 cup frozen berries of your choice. Blueberries, raspberries, strawberries - They're all delicious this time of year! (you can mix them, too!)
  • 1/2 cup low-fat plain yogurt
  • 1 tbs sugar, splenda, or honey (optional)
  • A blender

Throw it all in the blender and blend until creamy. Serve immediately.

How do you like to make your smoothies? Do share! :)

Monday, 23 August 2010

Jambu™ Himalaya's at the SS Red Oak Victory Ship by Kate McVaugh


Not planning a trip to Nepal, I still figured that my beautifully funky Jambu Himalaya’s would be just the ticket for exploring the SS Red Oak Victory docked in the WWII Historical Region of Richmond, California.

Built by Kaiser Shipyards in Richmond, and commissioned by the US Navy in 1944, the Red Oak Victory ship was converted to a floating museum in 1996. I wanted to test the walkability of my Jambu’s over the decks and through the tight passageways of this WWII ammunition carrier.

The first challenge is to ascend the bouncy gangway to board the ship. The Jambu’s had no problem gripping the less than stable metal walkway that leads to the deck. And although the Red Oak is securely tied down, it was a typical cold and windy summer day and I was grateful that I had shoes that were up to the task of keeping me from blowing overboard.

Outside decks of a ship are no problem for most types of footwear, but those narrow, steep stairways are a different story. The real test was descending on a metal ladder at nearly a 45° angle into the bowels of the ship. True, I was gripping onto the railings for my dear life, but my feet tread confidently and without catching on the uneven surface. I really could have been scaling narrow mountain trails in the Himalayas.

There are lots of places to stub ones toes on a naval vessel, particularly going through those doorways which have a raised portion at the bottom. I was cautious enough to avoid that hazard but even if I had slipped up, I knew the sturdy construction of my Jambu’s would have come to my rescue.

Meandering in and out of narrow crew quarters, the communications office, mess hall, and a labyrinth of steel corridors, my feet felt cozy and happy. It seemed fitting to be wearing shoes made partially of recycled materials on a ship that was built at a time when nothing was tossed out and everything was reused. I didn’t even notice my feet, which allowed me to reflect on all the men and women who had built this ship and of those who had served on it. And that is what shoes should be; a complete afterthought.

A walk through history was absolutely the best way to try out my new Jambu’s.


Thank you Kate McVaugh for the great review on our Jambu™ Himalayas! Check out Kate's travel blog at http://katerambles.blogspot.com/

Thursday, 19 August 2010

Think Outside the [Lunch] Box ;)


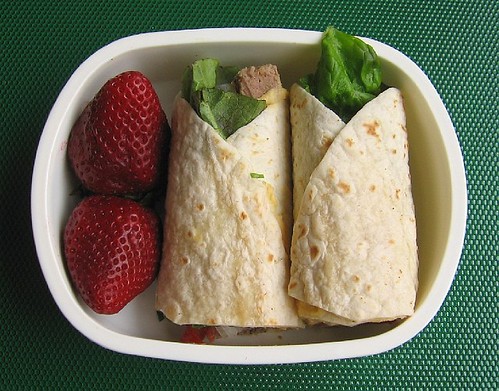
When Mothers think of a quick lunch to send their kids off to school with, they oftentimes think of one thing - PB&J. Choosy Moms choose Jif.. right?? Your regular peanut butter and jelly sandwich makes a great lunch...sometimes, but the truth is it's easier than you think to come up with creative, and healthy lunches for the school cafeteria. Here are some ideas to get the ball rolling :)

  1. Strawberry and Cream Cheese Sandwich - Use reduced fat cream cheese (it really tastes just as good!) on whole wheat bread. Spread around the cream cheese and add slices of strawberries on top. If your kids complain about the bread getting soggy, pack up the berries in a small container and let them do it themselves.
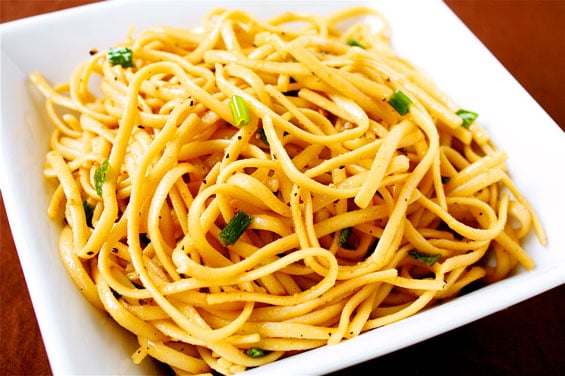
  2. Sesame Noodles - Asian sesame noodles can often be your kid's favorite meal. They're good hot and cold, so pack them up in a container and send your child off with this tasty lunch (easily made the night before without them having a clue :)
  3. BBQ Chicken Sandwich - Any leftover chicken in the fridge? Shred and mix it up with some BBQ sauce and grated carrots. Add a leaf of romaine and put it onto a whole wheat bun for a quick and healthy sandwich.
  4. Hummus Wrap - Slab on some Hummus and add grilled or fresh vegetables to a large wrap. It's a great healthy choice, and your kids will be coming back for more!
  5. Peanut Tofu Pita - Bake some tofu and toss it with your favorite store bought Thai Peanut Sauce (a little goes a long way). Stuff it into a fresh pita and add some vegetable. They won't even notice the veggies, once they take a bite of this delicious tofu.
Don't forget to pack some healthy snacks with your kid's lunch. Such as: granola bars, sliced veggies with ranch dressing, popcorn, fruit kebabs, or chips. Throw in some cookies and a juice box, and your favorite student is good to go :)

What's your favorite lunch to pack for school? We'd love to hear from you!

Monday, 16 August 2010

Back to School!

Our spring/summer season was really great one, but the Fall 2010 styles are quickly making it into stores! You know what that means... summer is coming to an end, and it's back-to-school time!

Going back to school shopping was always one of my favorite times. My mom would take us from store to store and we'd all get
what we needed for the upcoming school year. I think Staples, Walmart, and Target were my three favorite stores as a kid.

So before your kids go back to school, we'd like to share some helpful ways to stay prepared and organized.

The more prepared your children are walking through those doors, the more confident they will feel, and the better they will perform in school.

Check lists are key - Make a list for everything! What they need, what you need, who you need to contact, etc. As long as you're keeping track, lists are a mom's best friend :)

Start collection coupons - there's nothing better then saving on all your back to school necessities. Come prepared to all your favorite stores - you'll be amazed at just how much you can save this time of year.

Get organized at home - Make copies of important documents coming in from the school. Putting important notices and letters from teachers into folders for your children can be helpful throughout the year.

Mark up your calendar - Get all the important dates down onto a master family calendar. Make sure to include all parent-teacher meetings, as well as sporting events and extra curricular. An easily accessible calendar for the family is great to keep everyone updated.

Get the medical stuff out of the way - No one likes getting calls about how they're kid missed a random shot somewhere along the line. Take care of all medical needs before the year begins. Sure, things will come up, but at least you'll have what the school needs done :)

Buy what they need - It's hard to say no, but put your foot down so your credit card bill doesn't make you crazy.

Don't forget to have a great time! Like I said, back to school shopping can really be a great time for you and the kids. Happy shopping! :)

Friday, 13 August 2010

The Crow Pose

When I first started Yoga, this pose was one of my favorite. A bit challenging at first, but fun and relaxing too! It is a continuation of the Downward Dog pose, so if you've got that one down - you're good to go :)


The Crow Pose AKA Bakasana


Beginners:


Helps with strengthening your wrists, forearms and abs. Improves balance.


  1. Start off by getting into the Downward Dog pose. Make sure your palms are pressed into the mat.

  2. Walk your feet forward until your knees touch your arms.

  3. Bend your elbows, lift your heels off the floor, and rest your knees against your outer upper arms.

  4. Keep your toes on the floor, you abs engaged and your legs pressed against your arms. Hold for 5-10 breaths.


Advanced:


  1. Start in the beginners position and slowly move your body forward until the weight of your body is balanced over you hands.

  2. As your upper body is tilting forward, slowly lift one of your legs toward the ceiling.

  3. Squeeze your glutes, spread out your toes, and hold for 5-10 breaths.

  4. Repeat with the other leg.


We hope you've enjoyed Yoga Week with Jambu™ - Have a great weekend :)


Wednesday, 11 August 2010

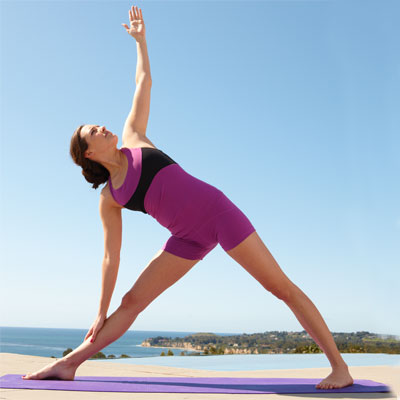
The Extended Triangle Pose

The Extended Triangle pose is one of the best poses for beginners, but can also be altered for the experts - so if you've already signed up for yoga, don't worry - this pose is good for all levels.

The Extended Triangle pose AKA
Utthita Trikonasana is good for strengthening your legs, stretching the groins, hamstrings, and hips. It will also help with back pain.


Here's how it's done:

  1. Begin by reaching your right arm forward, drawing your right thigh upwards and tucking your hip as you come forward.
  2. Drop your right hand down onto your shin or ankle, or if you are more flexible, onto the floor inside or outside your right foot. Do what feels most comfortable.
  3. Your right shoulder will stack on top of the left one as you open your chest reaching your left fingertips upwards while keeping your right shoulder rooted in its socket.
  4. Take your gaze up toward your left fingertips.
  5. Draw your right thigh muscle upwards, deepening your right hip crease.
  6. Stack your left hip on top of your right hip.

Repeat on the left side

We hope you find this pose as relaxing and rewarding as we did! :)