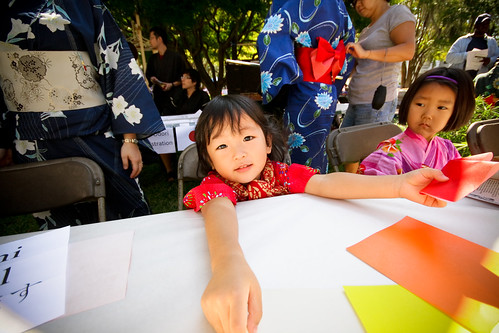
We really need to see clearly through things in life, but we don't always have to take a clear picture. Try to get your vision slightly out of focus and see what magic is going to happen on your photograph for your wordless Wednesday!
Tuesday, 28 September 2010
Monday, 27 September 2010
The Perfect Recipe for Fall: Butternut Squash Soup
As the weather gets cooler, and the leaves start falling, I thought I would share one of my favorite fall recipes for Butternut Squash soup. This recipes is so quick, easy, delicious, and nutritious!
What you'll need:
- 1 medium onion, minced
- 2 pounds prepared peeled, cubed butternut squash
- 6 cups water
- 1 cup coconut milk
- 1/2 cup white wine
- 2 cloves garlic, chopped (or 2 frozen crushed garlic cubes)
- 1 tablespoon fresh grated ginger (or 1 teaspoon ginger powder)
- 1 teaspoon curry powder
- 1/4 teaspoon dried thyme
- 1 teaspoon kosher salt
How to:
- Throw all ingredients into a 6qt pot. Cover, and bring to a boil.
- Reduce to simmer, and cover. Allow to cook for 30-40 min (until butternut squash is soft).
- Use an potato masher or fork to purée or mash squash and continue cooking for 10 minutes.
- Serve and enjoy!
Let us know how it came out, and don't hesitate to share your favorite fall recipes! :)
Wednesday, 22 September 2010
Wordless Wednesday... How to create long term exposure photography!
Continuing our Wordless Wednesday's...
Below are some examples from our intern's personal collection, what a hobby!
Longterm Exposure Photography:
Experiment with with long term exposure with your family, friends, or pets!
-All you need to do is, set your camera on a tripod, deck or any where will make it stable.
-Turn the flash off.
-Next you have to set your camera's exposure time to the longest setting (for example my camera is 8 seconds)
-Turn on the self timer and you are all set! Be creative, it's showtime!
Tuesday, 21 September 2010
Say Goodbye to Those Bad Hair Days
wild hair.
1. A Low Ponytail: After you brush out all those knots, and your hair is nice and smooth, simply gather your hair into a low ponytail. You'll be surprised how cute yet professional this look can be!
- How to spice it up: grab a small piece of hair out of the ponytail (about 1/2 inch thick) and wrap it around the ponytail holder you've used. Once it's wrapped, secure it with a bobby pin under the ponytail in an upward direction.
2. A Messy Bun: This style is so
popular, and takes just about no effort :) Quickly brush the top of your hair to make sure there will be no bumps after you make the bun. Grab your hair in one hand and have a ponytail holder ready in the other. Pull the hair through once thro
ugh the band and then mess around with it until it becomes a bun - it's that easy!
- How to spice it up: If you have bangs, pull that back with a bobby pin on top of your head. If you don't another alternative is wearing a headband with this style. Instant style!
3. A Low Side-Braid: This look is so easy. You'll see it all over magazines and TV shows - the celebrities love this style! Brush out your hair until it's manageable. Once it is, pull you hair to the side and plit into three event parts. Braid (right part over middle, then left over middle, then right again...) 3/4 of the way down and secure with a ponytail holder.
- How to spice it up: Tie a ribbon over the ponytail holder. It adds a lot to this already adorable look!
Friday, 17 September 2010
Jambu™ Book Review: "The Girl With The Dragon Tattoo"
Recently, I found some time to read for pleasure. I honestly forgot how great it is to slow down for a few days and read a great book. When I went to Borders to pick up a book, The Girl With The Dragon Tattoo (the first of a trilogy), by Stieg Larsson, was one of the first I saw. When I read the back cover, I was already interested.
What it's about:
Harriet Vanger disappeared decades ago when she was only 16, and since then, her uncle Henrik Vanger has been on a search to find who he believes is her murderer. Henrik is now a retired industrialist, and decides to hire Mikael Blomkvist, a financial journalist, to investigate the crime further. Mikael was recently sentenced to prison after losing a libel case, involving damaging allegations about the Swedish billionaire Hans-Erik Wennerström. He takes the freelance job offered by Vanger after Vanger promises him sources that will bring an end to Wennerström. Blomkvist teams up with "the girl with the dragon tattoo" aka Lisbeth Salander. The 24 year old computer hacker and background investigator, sports tattoos and piercings, but don't let the image fool you...
Why You'll Love it:
I, for one, couldn't put the book down! A true page-turner that will keep you at the edge of your seat, this suspenseful thriller has everything in it! Is is well written, and so much more than just another murder mystery. It digs deep into the past of the Vanger family, while developing the stories of the other characters. Lisbeth and Mikael make an interesting team that will make you want to read more. Overall, The Girl With The Dragon Tattoo is a great quick read that will leave you asking for more!
Interesting facts about the author:
- Stieg Larsson died shortly after bringing the manuscripts of the trilogy to the publisher.
- He witnessed the gang rape of a young girl when he was only 15. The author never forgave himself for failing to help the girl, whose name was Lisbeth - like the young heroine of his books, herself a rape victim, which inspired the theme of sexual violence against women in his books.
Tuesday, 14 September 2010
Lights on windows-the sonata played by dust
Wednesday, 8 September 2010
Be your OWN Professional Photographer
There is nothing better than taking amazing pictures for your family photo album or your Facebook albums. Sometimes you just want to capture the most amazing moments, but no need to take a class to learn how to shoot like a pro. Below are some tips on how to get great shots of your kids, or you can translate some of these ideas into shooting anyone, or pets even.
Tips for taking your kids’ pictures
- Try different angle, especially getting down on kids level.
- Don't only take smiling pictures... try taking pictures when they are serious, sad, crying, angry or surprised, or whatever expression they do best.
- Don't pose most of your pictures. Try to take more pictures when they are in action. It works better when they do not know your camera is pointed at them. You want to get more natural shots of their raw emotions- you don't want every smile of your kids to come by telling them to say “cheese”.
- Take pictures from the top, make them look up the camera, or lie down taking their picture when they look down into the lens. Get playful
- Bring more of their little friends or pets together so you can get them playing in action.
- Another idea is to dress them in more grow-up style outfits, kids are so cute when they try to imitate adults.
- Take more than one shot. The more pictures you take the more likely you'll be to get the shot look more natural and vivid. It is amazing the difference just one second can make. So take as many as your memory card can hold!
- You know your kids better than anyone- its better to take pictures when your children are not hungry, sleepy or have to go potty.
- Sometimes pictures featuring in their body parts like their little hands or feet, eyes or behind make for cute pictures.
- Remember to maintain and store those pictures. If they are digital files, back up them frequently in DVDs incase your hard-drive lost memory by accident. If they are film pictures, develop the pictures and store the film in appropriate cases in a dry, cool, clean environment.
- Have fun and take as many photos as you can!
Please feel free to share some of your pictures with us!
*All of the photos above have been taken by our new intern, Ken, just to show that you do not have to be a professional... all you need is a little TLC. :)Tuesday, 7 September 2010
The best unbrownie you've ever ate!
This past weekend was the perfect weekend to picnic, the weather was great and everyone is always happy to have a 3 day weekend. One of the Jambu team member's baked the best brownie treat for her picnic- it was so delicious we had to share.
This melt in your mouth brownie was poured into cupcake tins and looked a little like a muffin at first, but after the first bite you're in heaven. The marbled brownie mix was perfectly balanced, and not one, but two tiny Reese's cups were stuffed into the center of the brownie! Delicious!
Using marbled brownie mix- prepare the mixes as directed on the box. After preparing mixes pour it into individual cupcake tins 1/2 full. You can probably create a better looking swirl for your "marbled" brownies on top using a knife or fork (um, don't tell her I said that haha). Once you get the batter in, push one or two mini Reese's peanut butter cups in to the center.
There you have the best "unbrownie" you have ever ate!
Subscribe to:
Posts (Atom)